Vet Wrap Crafts from January to December
Vet wrap bandage tape assists with injuries, but can pack an artistic punch in the hands of the creative. In fact, it has become an art form in many veterinary clinics with vet wrap artists around the showing off their designs on Instagram and other social media platforms.
We've spent the past year experimenting with fun crafting ideas using WildCow bandage products. So, grab your favorite wrap, a variety of containers, scissors, glue dots, and ribbons so you can create your own vet wrap décor.
January - Fireworks

Ring in the new year with these fun faux fireworks. To make, wrap vet wrap around an empty toilet paper or paper towel tubes. It is easier if you wrap the ends of the tube first. To create the flame, push a twist tie that has been folded in half through the piece of wrap on one of the ends. These can be designed to match any décor, and would also be great for Memorial Day or Fourth of July decorations.
February - Emoji Bucket and Wine Bottles

Take an old container – we used one that protein drink powder came in- and cover it with your favorite Valentine’s Day colors. Use yellow vet wrap to cut out the hearts for the faces. This would be great for filling with love notes, used as a card exchange box in a classroom or office, or to fill with sweets as a unique gift.

Wine bottles and vet wrap are a perfect match! Here we have a penguin, a simple bud vase and a light. The bud vase would also work well as a light, just swap out the flowers for a light-up cork.
March - Leprechauns

What would March be without the Irish and a bit of luck? Celebrate the day with these leprechauns. The center one is made from what else, but a beer bottle, while the other is another wine bottle. Also of note, the wine bottle is actually a single design, we just added a pom-pom beard and larger eyes.
April - Utensil Buckets, Table Decorations

Looking for a practical way to ensure everyone has the needed utensils for Easter dinner? Grab a few Talenti pint containers and create these cute animals. We added extra height to these by placing the lids at the bottom of the pints, then covered them with vet wrap for the bows. To create the bunny’s ears, we put 2 twist ties inside the wrap so that is would hold the shape better. Hold them in place by tucking them behind the vet wrap.

Nothing says spring and Easter like a cute bunny or baby chick! This is actually one wine bottle with a different image on each side (though making them as a set would be great). For the bunny tail, adhere white pom-poms with glue dots.
Hint: For the animal bodies, draw the shape on to card stock first, then cut it out and trace on to the vet wrap. Then cut the vet wrap.
Pair them with the utensil buckets for a fun tablescape.
May - Kentucky Derby
 Since vet wrap was created to help in the animal world, acknowledging the Kentucky Derby is a must. Held in May each year, the Kentucky Derby is a time for competition as well as visiting with friends and family. These pieces were crafted using a couple of beer bottles.
The Jockey: Look up some pics of jockeys and create a look that works for you. The hat was made by wrapping a cotton ball with vet wrap and molding until the desired shape achieved. To give the hat a brim, place the “hat” on to a small piece of cardboard. Cut to the size you want, then wrap with the vet wrap. You can either glue the hat in place or leave a length of the wrap attached at the bottom of the hat, then slide it into the bottle.
The Horse: Wrap just the upper part of the bottle with vet wrap to give the illusion of the horse’s shoulders. Once you have it the width you want, you can then wrap the entire bottle. The horse’s head was created by cutting a piece of cardboard to the desired shape. We cut a couple of smaller triangles for ears and some small pieces of wrap for the mane. While the vet wrap will stick to itself, you might need to add a drop or two of glue to be sure it stays attached to the bottle.
June - Father’s Day
 Need a fun craft for the kids to make for dad? Grab some cardboard and vet wrap colors of your choice and create a personalized card. The top piece (better for older kids) was made by taking a piece of cardboard cut to the size of a place mat, stapling the ends of strips of vet wrap to 2 sides then weaving the vet wrap (remember making construction paper place mats of potholders?). While we choose a fishing theme, your design is only limited by imagination.
To make the tie, cut a tie shape out of cardboard, and wrap with the vet wrap of your choice. The tie’s pattern can be as simple or elaborate as you want. Cut out another piece of card stock, and wrap with vet wrap to create the card.
July - Birthday Lights, Sunflowers

Light up your night time tablescape, before setting off the fireworks. These simple lights are made by wrapping Talenti pints in red, white and blue vet wrap and adding some tea lights. Perfect for any patriotic holiday!
 Whether you opt for a sunflower or choose something else, vet wrap is a great medium for designing flower art to match any décor.
To create the petals, we recommend using a template. We made one using the edge of a small plate to draw to arcs that intersected. Then traced our template using a black marker to provide some dimension in the final design. Finally adding an extra style by wrapping the neck of the bottle with twine.
The tub is a quart size Talenti jar with strips of dark green, tan and yellow on it. We stretched vet wrap across the lid so that the petals could easily adhere to it, then layered the petals on top.
August - Back to School

Not everyone is thrilled about going back to school. But perhaps making these projects will generate some excitement.
Crayon box: This was made from a Talenti jar (could also use a washed-out veggie can) that was first wrapped in white. The crayons are strips of various vet wrap colors, that are cut to a point on one end. Place them in the order you want your crayons. Next, take a piece of yellow that has an arc cut in it to look like that of a crayon box. Add a fun face, and you have a perfect box of crayons.
Pencil: Made by using a tall mailing cylinder, and then covering it to look like a pencil. If you opt to use a lid, then, it would be the perfect place for the tip of the pencil.
Welcome Sign: Made from a piece of cardboard covered to look like a chalkboard. We used a chalk marker to do the writing – though you could also do the writing with paint.
The Apple: Grab a small jelly jar or Parmesan cheese jar and wrap a few layers of any color around just the middle of the jar, to give the apple more dimension. Once you have the center of the jar as thick as you want your apple to be, wrap the jar in red. Create the lid by stretching vet wrap across the sides of the lid – leave the space in the middle uncovered- and pull taut all around. The stem is made from a black twist tie folded in half and some green vet wrap. Fold a piece of wrap in half, and cut your leaf shape. Cut a strip of red to go in the center of the pieces already on the lid. Using scissors, put a small hole in the center of this strip, and poke the twist tie through. Tape the tie in place on the underside of the vet wrap, then wrap the leaf around the tie.
September - Pumpkin Trio, Hoops

Grab some small boxes, a few wood ‘scraps’, or as we did – Styrofoam, and turn them into fun pumpkins. We created the stems by wrapping a twist tie with dark green and then adding in some twine for the vines. Could design them as “just pumpkins” or could do faces on them for jack-o-lanterns. These pieces work great as fall décor, or as part of a tablescape.

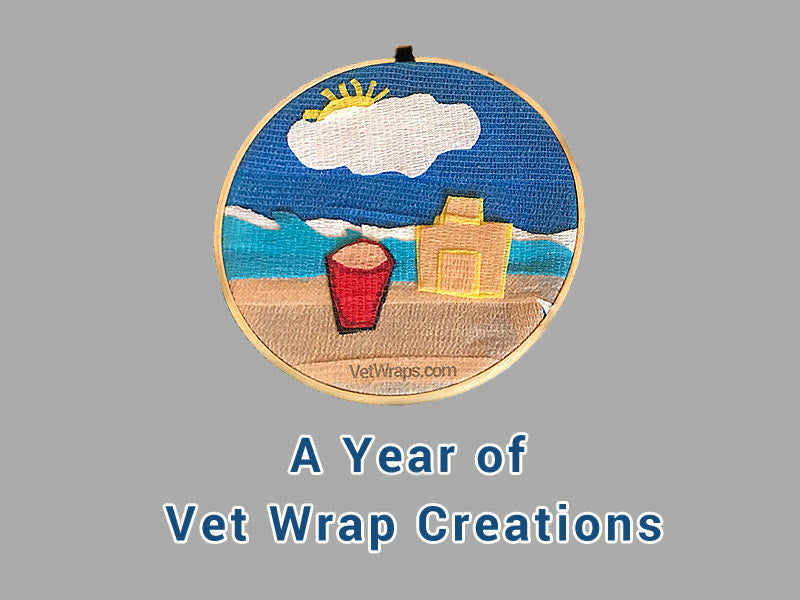
We found some old embroidery hoops at a local thrift store and decided to create vet wrap wall art with them. With the classroom in mind, we choose to depict an image for each season. To create the background piece, stretch the vet wrap across the bottom hoop, then hold in place with the top one.
October - Tombstones and a Ghostly Trio

Do you have lids for plastic containers, but not the containers they go with? If so, you are not alone. So, why not turn those lone lids into a fun craft project? We used some lids from take-out containers to make these fun tombstones.
Place them on a small picture stand as part of a tablescape. Could more ghost pieces like the ones on the R.I.P. one to write the names of your food items on a Halloween buffet.
 These were made using long rectangle Styrofoam blocks. For some extra height, we added an empty vet wrap tube to the tallest one. Then just cover them with white vet wrap, add the faces and it’s time to call the Ghostbusters! Leave them plain, or use markers to write BOO on them.
Note: To get the sides of the blocks covered, you can use some of the 2-inch vet wrap, then use the 3-inch for the wide part. As vet wrap sticks to itself, smooth the edges down for a finished look.
November - Scarecrow and Pie Garland

This particular project is one that sounded simple in concept but took a bit to execute. That said, it was fun to craft. Our scarecrow was made from a long piece of Styrofoam.
- Cover the top part with a 3-inch strip of vet wrap (we choose tan).
- Wrap the next 4 inches in the shirt color. The arms are made by rolling 2 strips of the shirt color into a tube, then attaching them on the sides.
- Create the bib of the overalls by cutting out 3 small rectangles.
- For the pants – first, cover the bottom of the block in a contrasting color so that you can distinguish the overalls from the background. Then using wide strips of vet wrap, apply the ‘legs’ at a slight angle. Wrap the edges of the legs around the block and adhere the pieces to the background color.
- Add the belt to hide the ‘seams’ of the overalls.
- The eyes were done by layering 3 colors of vet wrap, each triangle being a bit smaller than the one underneath it. The nose is emphasized by tracing it with a marker and adding cross-over lines, the mouth is drawn.
- Make the hat brim by wrapping wide vet wrap around the top of the foam, then filling the ‘bowl’ with vet wrap scraps and cotton balls. Form a pointed hat shape, then add another strip of the color to give more height. The brim on the hat was made by folding a piece of vet wrap lengthwise then sticking it to the hat.
- For extra details draw on button shapes, use stickers or small pieces of vet wrap.

Nothing says fall and Thanksgiving like pie! Especially pumpkin and apple ones. Make the slices by first drawing a circle on cardboard, then cut it into 'slices'.
The pumpkin slices are topped with a white pom-pom (adhere with a glue dot). The apple pies are distinguished by their latticework crust. To create the garland, use strips of vet wrap to hold the string in place on the back of the pieces.
December - Elves and Tile Ornaments

These could be used in a variety of ways. Be it a part of a garland, as ornaments (just add a loop to hang with), as gift tags, or a place marker at a holiday dinner. No matter the choice these are fun and easy to do. Just grab some cardboard to cover, the vet wrap of your choice and some embellishments and everyone in. the house can get involved in their creation!

The tile ornaments were made by folding the 3-inch wide vet wrap into strips and then using small strips to hold the loop in place. Then cut out blocks using the tan vet wrap. Write the letters using a permanent marker. Embellish with stickers, pom-poms or any other items that suit your style.
Whew – a whole year of vet wrap projects! Now, what creations can you make? We look forward to seeing your designs and sharing more of ours with you.
While we choose to do pictures that had a bit of detail, you (or the kids) could create any design. In fact, we would love to see what you create! Just share it with us on our social platforms - @vetwraps on Facebook, Twitter, Pinterest, and Instagram.